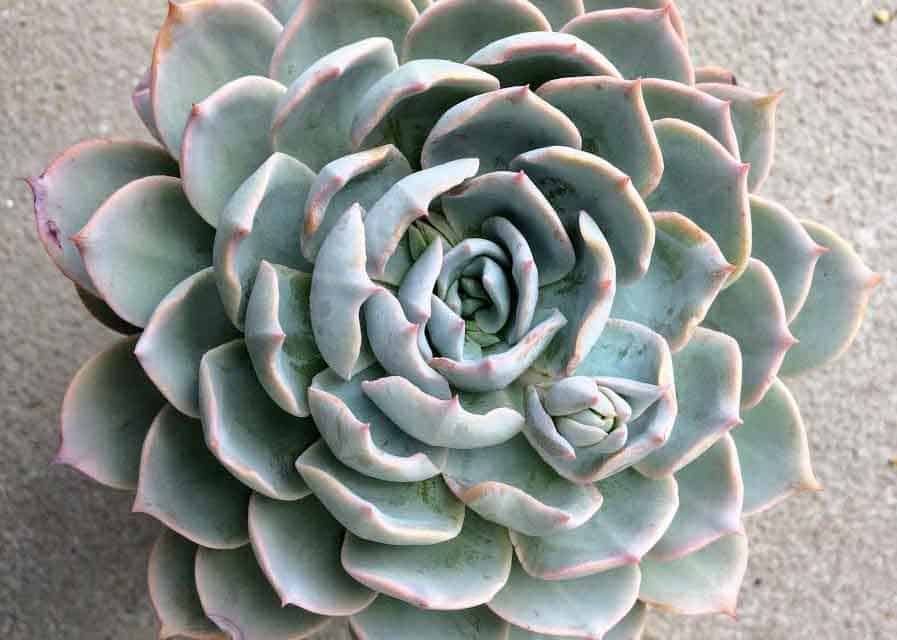
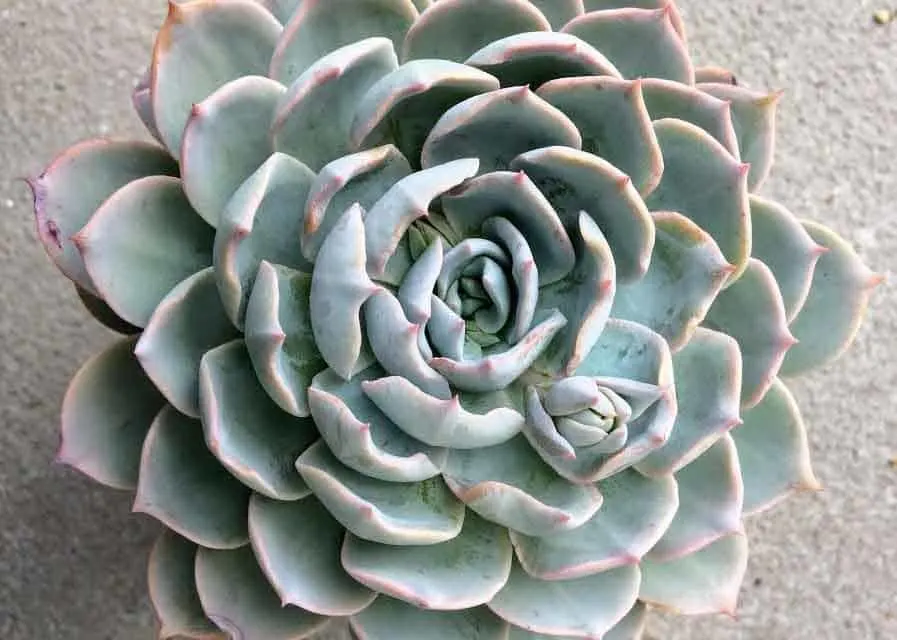
Echeverias extend from Southern Mexico to South America. Echeverias are characterized by their gorgeous rosettes with exquisite features and colors. The rosettes vary in shapes and sizes from tight and short-stemmed or hanging from stems.
They can remain small or grow up to 12 inches wide. The leaves also vary widely, from thin to thick, and smooth to furry, and come in many different shades and colors. Due to their beauty and desirability, many hybrid echeverias have been made.
They can be propagated from seeds, offsets or individual leaves. Some echeverias include Hens and Chicks variety, but echeverias are different from hens and chicks. Echeverias can be grown in ground or in containers or planters.
How to Propagate Echeverias
If I had known echeverias were that easy to propagate, I would have done it sooner. I have had this lone echeveria plant for years. It has been flowering for me every year and produces really beautiful, showy pink flowers.
I have been waiting for it to produce babies or offshoots, but so far, it has not. From time to time it gets ‘leggy’ and since I don’t like how it looks when it gets leggy, I trim it down by beheading it and repotting the beheaded top back in the soil and chucking the rest out.
What I should have done is I should have kept the beheaded stem and waited for little babies to emerge from the sides of the cut stem, like this.


Seed Collection
Another way to propagate this echeveria is by collecting seeds from the flowers after it blooms. After the plant blooms, the flowers close up again. That’s when they hold tiny seeds in their pods. These seeds can be harvested when dry and planted. The seeds will sprout and new plants will develop.
I didn’t have the patience and the knowledge to do any of these methods of propagation back then.


What I did was I propagated from leaves and had great success from this method. Some echeveria species are harder to propagate than others. If propagating from leaf, use more than one leaf because not all leaves you try to propagate will be successful.
How to Propagate an Echeveria from Leaf Cuttings
Step One
Choose healthy leaves. You will have better success when you start with a healthy mother plant and healthy leaves. Look for full and plump leaves, not dehydrated and flat leaves. Choose leaves that are uniformly colored without any discolorations, spots or marks. Do not use leaves that are damaged, ripped, torn or misshapen.Gently remove the leaves from the stem.
Step Two
Using your fingers, gently twist off the leaves from the stem with your thumb and forefinger. Some leaves come off easily, some are firmly attached to the stem. Gently wiggle the leaf back and forth until the whole leaf comes off.
You want the whole leaf including the base that attaches to the stem. If the base of the leaf does not come off, or if the leaf gets damaged, it will not survive.


Step Three
You may not have a 100% success rate so it is best to use more than one leaf when using this method to propagate. Take a few healthy leaves and lay them out to dry. Wait for the leaf wounds to dry. This can take anywhere from one to two days to about a week. You will see a callous or scab form at the base of the leaf where it was detached from the stem. The leaves need to be placed somewhere dry, warm and away from direct sunlight during this process. The leaves need to be dry and calloused over before you place them in potting soil or they can rot and die.
Step Four
Dip the leaves in rooting hormone (optional). This is optional. I have never used a rooting hormone in any of my propagations. Dip the calloused end of the leaf into the rooting hormone then immediately stick the same end into a suitable potting mix.
Pack the soil around the leaf to secure it. Rooting hormone is optional and you can skip this stage if you decide not to use a rooting hormone. Just stick the calloused end of the leaf directly into the potting mix without a rooting hormone.
OR
Lay the leaves flat on a bed of suitable potting soil instead of sticking them in the soil. This is the method I used. Leave some room between the leaves to allow for space for new plant growth.
Step Five
Keep away from direct sunlight. While waiting for the leaf cuttings to root, keep them away from direct sunlight. You can place them in a shaded area away from full sun. Leaf cuttings will shrivel and burn when exposed to direct sunlight or full sun.
Step Six
Mist the leaves with a spray bottle. Mist the soil every few days or daily if the climate you live in is dry. If you live in a more humid climate and the soil stays moist, mist every few days or until the soil feels dry.


Roots will start to grow. After about four weeks, you will start to see little pink roots growing from the cut. If you laid the leaves flat on the soil this is easier to see. If the cut end of the leaves are buried in the soil, you will not see the roots growing unless you pull them out of the soil.
You can cover the exposed growing roots with a thin layer of soil to prevent them from drying out. Continue to mist the soil every few days or when it is dry.
After about four weeks or more, a new plant eventually emerges with leaves of its own where the roots are growing. This can take anywhere from a few weeks to a few months. The leaf that you used to propagate will start to wither on its own.
You can choose to gently twist the leaf off or wait for it to fall off on its own. When removing the mother leaf, be careful not to damage the young roots. Keep missing the baby plants every few days or when the soil is dry.


Step Seven
Transplant the new plant. When the baby plant becomes bigger and the mother leaf withers, it is time to transplant the succulent into its own pot. If the withered mother leaf is still attached to the new plant, gently pull it off.
Transplant the baby plant in its own pot using a suitable potting mix. I used cactus mix and perlite.


Step Eight
Protect the new plants from direct sunlight. The new plants are still delicate at this stage and will not be able to tolerate full sun. Place in a shaded or partially shaded area away from direct sunlight to avoid scorching the new plant.
Step Nine
Succulent cuttings need a little more water than mature plants until they establish roots. You can mist the soil or lightly water the soil every few days or whenever the soil feels dry. Once the plant is more established, water as you normally would your succulent plants and let the soil dry out between waterings.
When propagating from leaf cuttings, you can end up with a lot of new baby plants like these. Sometimes, you can get more than one plant from a single leaf.


Caring for Echeverias
Potting Soil
Echeverias need a well draining soil to prevent root rot. I have had great success with a mixture of cactus soil and perlite combined to approximately 1:1 ratio. You can also use potting soil or cactus soil combined with coarse sand in 2:1 ratio.
Water
Water when the top inch of the soil feels dry. Water more during warmer months and less during cold winter months. During the active growing season, water plants thoroughly until water seeps out of the holes of the pot.
Wait until the soil dries out before you water again. You can feel the top inch of the soil for moisture before watering. It is very dry where I live and I water as much as once every week in the summer months when it gets very hot.
We get a lot of rain during winter so I refrain from watering and rely on rainwater.
Fertilize
Fertilizing is not necessary especially if you just repotted your plant in fresh potting mix. But if the plant needs a boost or has been sitting in the same old potting mix for over a year, fertilize with a balanced blend of fertilizer for houseplants or a specialized fertilizer for cacti and succulents.
Dilute to ¼ to ½ strength and fertilize only during the active growing season, or from spring to early fall season, about every two weeks.
Sunlight
Some echeveria species do well under full sun and some need protection from intense afternoon sun. Most need at least 4-6 hours of bright light, or more. More fragile echeverias or baby plants cannot handle intense, full sun and need filtered but bright light to prevent sun damage.
Generally, smaller plants cannot handle intense heat or sun, especially newly propagated plants and bigger ones can take more intense sunlight . Even still, hardy plants that have been acclimated to full sun can still burn during intense heat or heat waves. Most plants need to be acclimated to the sun’s rays when you plan to increase sunlight.
Slowly increase the amount and intensity of sunlight to avoid burning the plant.
Plants that do not receive enough light eventually etiolate, start looking pale and stretch out to look for more light. Place plants in south or east facing windows indoors to ensure adequate lighting.
If needed, consider using grow lights to provide enough light indoors.


Echeveria Peacockii needs bright to full sun

Echeveria Black Prince needs bright to full sun


Echeveria Setosa needs bright but filtered sunlight
How to Get Echeverias to Bloom
Not all plants are mature enough to bloom. Some need time, and some will not bloom at all. If you provide and maintain proper care as mentioned above, you have greater chances of seeing them bloom. It takes a lot of energy for plants to produce flowers, and plants that are not healthy will conserve energy for something else, rather than flowering, so it is important to keep your plants happy and healthy to see them bloom.
Overwintering
Another big reason why some plants never bloom, especially the ones kept indoors, is that succulents need to undergo a cooling process. Overwintering is important if you want to see your cacti and succulents bloom. This can be achieved by keeping them cool and relatively dry in the winter months. Keep them cool during winter months with temperatures just above freezing, between 35-44⁰F (1.5-7⁰C). If kept indoors during winter, have them in a non-heated room if possible or keep the temperatures low to provide them the cold winter period that they need.
Night and Day Temperatures
Succulents and cacti prefer a distinct difference in night and day temperatures as well as summer and winter months. Succulents favor cooler outdoor nighttime temperatures of 50-55⁰F (10-13⁰C) or indoor night temperatures of at least 60-65⁰F(15-18⁰C). Especially when kept in a controlled environment, succulents prefer a marked difference between their night and day temperatures to mimic their natural habitat, with the cool night temperatures having an integral part in the plant’s growth cycle.


Follow these care guidelines to help multiply your echeveria and see them thrive.


