Once you get a new plant from the store, do you repot your plant or do you keep it in the same pot indefinitely? It is actually a good idea to repot your newly purchased plants as soon as you can.

Here’s why it’s a good idea to repot:
- You want to get that plant into a well-draining potting mix suitable for cacti and succulents. Oftentimes, the potting mix the plant is planted in may retain too much water and is not suitable for succulents and cacti. Getting the plants out of the nursery soil and into a more suitable one will ensure its long-term health.
- You can inspect the health of the plant more closely when repotting. You can check the plant’s root system to see if it’s healthy, and you can trim off dead or rotting roots, if any. You can also get rid of dead or dried leaves.
- You can also inspect for pests and insects that may be hiding in the plant that can infect your other plants if left unnoticed. If you find pests on the plant, you want to treat and isolate right away to avoid spreading the infestation to your other plants.
- You can choose a more suitable pot or planter. Part of the fun of repotting for me is choosing a pot or container to put the plants in. Ideally a pot that is a few inches bigger than the nursery pot it came in so that the plant has room to grow but not too big that you risk the plant sitting in moist soil for too long. Some people choose to reuse the same nursery pot which is fine, or you can get creative with your choices.
Below are some new succulent plants I repotted and why it was a good idea to do so:
Soil was too wet and not drying out fast enough.
This is probably the number one reason for rot. If the plant is left in that soil, the plant starts to rot from the roots up.


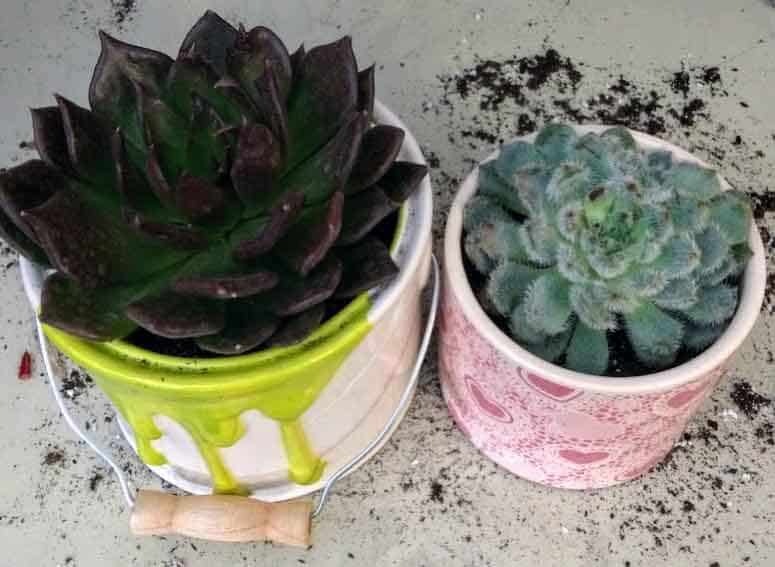
I purchased these two echeverias from the same store. One of them is an Echeveria ‘Black Prince’ and the other is Echeveria Setosa var. Deminuta (Firecracker Plant).


Echeveria Setosa var. Deminuta (Firecracker Plant)
This echeveria is covered with a soft, hairy fuzz giving it its distinct look. It got its common name from the flowers it produces, which are a burst of bright red and yellow flowers. These are native to Mexico and not frost hardy.
First, remove from the wet soil
I repotted this within a week of purchase. First thing I did was remove the plant from the nursery pot. I noticed the soil felt wet. I did not water this plant at all since getting it from the store which tells me that the plant may have been overwatered or sitting in the wrong soil. I also noticed that a few of the bottom leaves are mushy. I removed the dead, shriveled leaves at the bottom and tried to get as much of the wet soil off as possible.


Choose what medium to use
I used a cactus mix and added perlite for better drainage. Placed the plant carefully into the new pot and pack the soil around it tightly. I refrained from watering this plant since it was so wet until a week later to let it dry out first. After handling this plant I realized how tender and fragile it was compared to other echeverias with firmer bodies and leaves.
What to do with fallen leaves
I lost a few leaves in the process which I am going to set aside to see if they will propagate and produce new plants. This leaf I just wanted to show for comparison broke off from the middle and will not be suitable for propagation. You want a clean leaf that’s been removed from the base for successful propagation.
Echeveria ‘Black Prince’
This echeveria is a hybrid and has gorgeous dark green, almost purple and black leaves. It produces dark red flowers. Like the other echeveria, when I removed this from the pot the soil also felt wet. I removed the wet soil from the plant. See this leaf I pulled out? This leaf is a bit mushy and translucent, which is a sign that the plant may have been too wet.


I filled the pot with cactus mix and perlite combined then carefully placed the plant in the middle and packed the soil in around it. As with the first echeveria, I refrained from watering this plant right after potting because it was so wet.


Senecio Rowleyanus (String of Pearls)
Another plant that had very wet soil when I bought it were these Senecio Rowleyanus (String of Pearls). When I got this plant, I was in search of String of Pearls plant for a while but couldn’t find one locally. I eventually found one at this local nursery but it was in such a bad shape. Maybe that’s why I didn’t take a picture of it. The pearls were all shriveled up and some appeared rotten. It came in a 4-inch pot that was also cracked. I paid full price for this plant because I was desperate at that time to get a hold of this plant.
Shriveled pearls or leaves can also be from overwatering
When I asked the person at the store if it was overwatered, he said it was actually underwatered and that’s why the pearls were all shriveled up. But the soil felt very wet to me. When I got home I waited a few days before repotting to let the soil dry out a little. I find it easier to repot when the soil is dry. After a few days, the soil still felt wet so I eventually removed the plant to find the soil not just wet but soaking wet. This was after waiting for days for it to dry out a little. I live in a very dry climate so I was expecting it to dry out eventually. I think what happened was the nursery may have neglected it and then over compensated by overwatering the plant.
How I saved the plant
I tried to save what I could from this plant and cut off the strands that were green and discarded the dead, rotten ones. I was left with a few strands of green shriveled beads which I then laid on top of the soil. I used these small plastic hanging planters I had laying around from past purchases. I filled the pots with cactus mix and laid the strands of pearls on top of the soil. String of Pearls can be propagated from stem cuttings by sticking the end into the soil. Or you can also lay the strand onto the soil and whatever’s touching the soil will start to root eventually.


Looking Better
These plants have finally come around and are looking a lot healthier. They have started rooting. What I learned about this plant is they need shade and burn easily from too much sun exposure. They love rainwater and need a well draining soil. I wanted to show how repotting can actually save your plant from doom. And even when they come from a reputable nursery like this one, they can still mess up and give you the wrong advice.
Soil was too dry
Sometimes the problem is not wet soil but the wrong soil. I purchased this Crassula Pellucida Variegata (Calico Kitten) not too long ago. I have a small Calico Kitten growing in this pot with other plants and I wanted another one that I could plant in a hanging basket. This plant is just so beautiful with all the different colors and heart shaped leaves. This plant also trails and would look great in a hanging basket.
First, remove the old soil
I found this small one in a 3-inch pot. I took it out of its nursery pot and the soil it was in was completely dry. I tried to remove as much soil as I could. The soil was compact and very dry. It crumbled into small pieces when I tried to remove it and the roots were coming off with it. I tried to remove the soil but couldn’t remove completely because I didn’t want to lose all the roots of this plant, which was breaking off with the soil.


Repotting in fresh potting mix


I got an old plastic hanging planter that came with another plant and filled it with cactus mix and perlite. I placed the plant in the pot and packed the soil tightly around it. I gave it a good drink because it really needed one. The dark purple color of the plant indicates it’s been exposed to a lot of sun and very dry. I placed it in a partly shaded area to let it grow healthier roots. Hopefully this one will thrive now that it’s in a more suitable potting soil.
On a lighter note, not all plants that I get are in bad shape. In fact, most of them are in pretty good shape. Still, you want to repot and get them in the right potting mix to make sure they stay healthy. Here is a healthy mammillaria cactus I got a few months ago. This is a Mammillaria Hahniana (Old Lady) Cactus. It is native to Mexico and is a popular cactus easily recognized by its long, thin, white hairs which get thicker with age and can densely cover the plant’s body. It is light green to grayish-green in color and can grow up to 10 inches (25 cm) tall and up to 20 inches (50 cm) in diameter.


Here’s how I repotted it:
Step 1
Gather the tools you need. For this tiny plant I only needed gloves to protect my hands and fingers, a trowel, potting mix, and a small pot.
Step 2
Mix the potting mix with perlite in equal amounts. I like to do this to make the potting mix more porous and drain well. You can do this directly in the pot you are using or you can use a separate container to mix your potting soil.
Step 3
Add some potting mix in the bottom of the pot. You can put your new plant while still in its nursery pot in to see how much soil you need to be adding. You want your cactus to be sitting just above the rim of the pot.
Step 4
Using a glove or something to protect your fingers, remove the cactus from its nursery pot and inspect the plant and roots for any visible problems. This plant looks very healthy with a healthy root system.
Step 5
Press the soil onto the wall of the pot to provide room in the middle where your plant will go.
Step 6
Place the plant in and gently pack the soil around your plant and fill in any open spaces with potting mix.
Step 7
Top dressing. You can add a top dressing to give it a more polished look. Top dressing also helps to keep the potting mix from floating when you water the plant.
Step 8
Give it a good drink. This plant has not been watered since I brought it home from the store. I have had it for about a week before I had a chance to repot it. I watered it with stored rain water and gave it a good drink.
Step 9
Lastly, I introduced her to her new family. They like each other already, I can tell.


When I first started my collection of succulents and cacti, I didn’t realize the importance of repotting new plants. I have learned from past mistakes not to keep them in the same nursery pot and potting soil for too long. Luckily, these plants are resilient and usually bounce back. I’ve made the mistake in the past of keeping a Jade plant (Crassula Ovata) in its original nursery pot and soil it came in for over a year. I had a baby at the time and got busy with baby things. The plant eventually showed signs of stress and I finally got around to transplanting the plant. I did the same with another hardy plant, the Elephant Bush (Portulacaria Afra) and left it in its original nursery pot for over a year. Both plants are doing fine now but these are hardy plants. Other more tender, fragile succulents may not make it that long sitting in the wrong medium. When I get a new plant these days, I try to repot within a week or so.
If you need recommendations on pots and potting benches, please click on my resource page for ideas on what to purchase online. To read about how to choose the right pots for succulents, please check out my article “Choosing the Right Pot for Succulents.”

